 |
| Electric Scooter Wiring Diagram (click diagram to get a clearer view) |
I traced all the wires on the blue Electro Scoot scooter, confirming with voltage readings on the working red scooter, and came up with the above basic wiring diagram. Pretty straight-forward once you've worked through it all.
I then labelled all of the connectors and removed the motor controller, 12V voltage regulator, wiring loom, thottle control, instrument cluster and other electrical bits I think I'll need from blue scooter.
 |
| Wiring bits removed from the Electro Scoot scooter |
All looks pretty simple and I think the Electro Scoot wiring will interface to the Joker scooter's controls and lights ok. Just need to hunt down some LED light bulbs now...
Right, what's next while I wait for the frame and rear wheel assembly to come back from the engineer? Let's have a look at tidying up the Joker's seat, panels and covers...
First I disassembled all of the panels and trim and gave them a good clean. Then, I used some headlight lens polish (lightly abrasive, but not as bad as cut & polish compound) to cut & polish the panels and trim.
Hmm, still some scratches can be seen - even a few that are right through to the white plastic layer below. So, time to do some research on how flip-paint (colour change paint) is applied and how to patch it. Found out that first you need a black base, so I then touch-painted the scratches with black paint.
I then found some Chimera (green to purple) flip paint pigment powder on eBay. 5g of powder is enough for mixing with 200ml of clear lacquer. I then bought 2x 30ml touch-up bottles of clear lacquer on TradeMe. After a bit of experimentation later, I then touched-up the previously black painted scratches. The green on the touch-up flip-paint is a bit lighter/brighter than the original paint, but the purple is a perfect match, so it sort of works out ok - definitely better than white scratches and even the straight black.
Finally, I sprayed all of the panels and trim with clear lacquer, and how does it look?
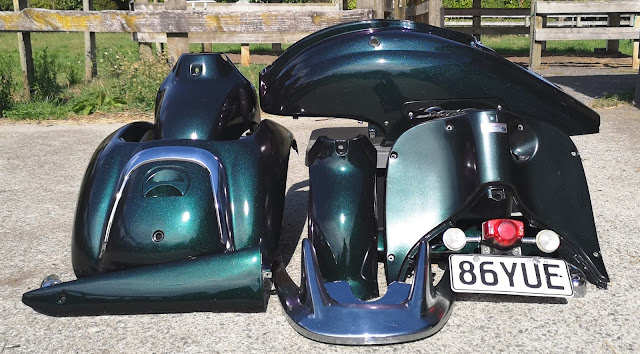 |
| Look at all those shiny, sparkly bits! |
Pretty damn good I reckon!
Then... Bang! We're in lockdown - thanks COVID-19 - grrr!
Bike frame is still away at the engineers (and
MX5 Cobra is still at the painters), so everything is on hold for a few weeks/months now.
Oh, well. Time to catch up with some hedge trimming and other maintenance around the farm... which, to be fair, is overdue due to spending so much time on these projects 😀. See you
next post once I've made more progress.


Comments
Post a Comment