Click this first post below for more details...

What's a Joker, and you're going to do what?!

The MX5 Cobra is out of the shed, so room for my next project 👍 MX5 Cobra project (see NZ Japanese Cobra blog) is all done bar the painting (soon hopefully). So, it makes way for my next project... Electric Conversion of a Classic Scooter So, I was toying with the idea of getting an electric bicycle to ride to work (on nice weather days 😃), but... wow, aren't they expensive for what you get! I then looked at electric scooters (moped scooters). For not much more than the cost of an electric bicyle you can get an electric scooter, but not a very nice looking one (like a Vespa or similar classic scooter). Then I remembered that before I decided to do the MX5 Cobra I liked the idea of doing an electric car conversion - so, light bulb moment - let's do an electric scooter conversion! A bit of research later to see how feasible it would be, estimating likely costs, etc, and the project was a go. But, what scooter should I convert? Obviously, the name "Vespa...

Starting the Joker conversion

Electric rear wheel matched to Joker scooter frame
Electric rear wheel, swing-arm and suspensioned positioned

Right let's get this conversion started...

First, better check the blue Electro Scoot scooter also works. Quickly did this by jumpering the 60V battery across to it from the red scooter...

Blue electric scooter powered from red electric scooter
Yep, blue scoter works too.

So, I decided to keep the red scooter in a running state for now, and cannibalise the blue one for the parts to convert the Joker. First step then was to strip the panels from the blue scooter and remove the rear wheel assembly (wheel, swing arm and shock absorbers). Removal was easy, so let's chuck it under the rear of the Joker frame and see if it looks doable...

Electric scooter rear wheel assembly position on Retro scooter
Yeah, I think it'll work well!

Ok, roughly looks like it's a go, so time to strip off the unneeded bits off the Joker's frame. Fuel tank gone. Coil and starter solenoid gone. Old battery box has to go...

Battery box location on Honda Joker Replica
Yep, that battery box (behind the gold seat latch) has to go!

That's better!

Honda Joker Replica frame stripped
A nice clean frame to work with now!

So, let's try positioning and aligning that swing-arm, rear wheel and shocks again...

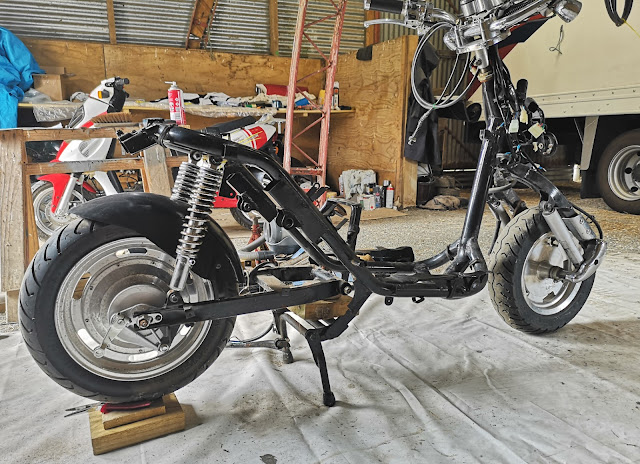
Electric scooter rear wheel assembly attached to frame
Sweet! That looks great to me.

For those with keen eyes for scale, you'll notice the electric rear wheel is 12-inch and the Joker's front wheel is 10-inch, as was the Joker's old rear wheel too. I'm pretty sure the 12 inch wheel will look fine once the scooter's rebuilt though, as it's mostly covered by the scooter's rear panels.

However, in order to have the on-stand ground clearance and the distance to the rear of the wheel the same as the Joker's old 10-inch wheel it took quite a lot of measuring and aligning, but all good.

Joker frame and electric rear wheel assembly are now away at an engineering shop to get the swing arm and shock absorber mounts fabricated and welded to the frame. So, I'm done with this side of things for now.

While I wait, it's time to trace, document and strip the wiring, controller and other electric bits from that blue Electro Scoot... see ya next episode 😃


Comments